THIS PROCEDURE MUST BE PERFORMED BY A QUALIFIED TECHNICIAN.
 WARNING
Risk of property damage. Improper water temperature settings can result in damage to the floor covering. Make sure the maximum and minimum water temperatures are appropriate for the application.
Remove Front Painted Panel
Remove the painted front panel of the brick storage cabinet by removing the sheet metal screws along the bottom and sides of the panel. Detach by pulling the panel forward and out.
Remove Limit Zone Cover
Remove the limit zone cover by removing the screws around the perimeter.
Remove Screws Around Limit Zone
Remove the screws around the perimeter of the limit zone and around the bottom of the left side, right side, and back upper panels.
Remove Screw(s) in Right Side Panel
Remove the screw(s) in the center of the upper right side panel.
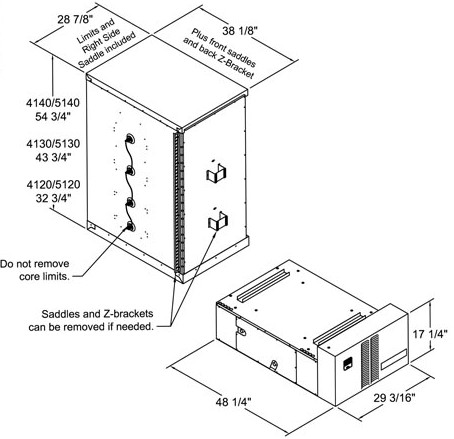
Remove Painted Panels
From the back of the system, lift and remove the painted panels. (See Figure A.)

Disconnect Brick Core Sensor
Locate the brick core temperature sensor(s) and disconnect them from their shipping position. Carefully lay the sensor(s) aside to avoid damaging them while removing the brick core. These sensors will move with the base.
Lift Brick Core
Carefully tilt the brick core (Figure B) to one side and lift the brick core up and off the base (Figure C.)
Move Base Assembly
Move the base assembly into the desired location, reassemble the system, and continue with the installation instructions.
NOTE: When reassembling the system it is extremely important to get all of the screws back in place, especially around the limit panel. Failure to do so can cause cooling of the limit switch bodies.